Showing posts with label camera. Show all posts

Sunday, June 2, 2013

Building a Better Second Life

Building a Better Second Life
Tips for squeezing both better performance and more detail
out of SL through efficiently made content.

 We all have our complaints about SL. The lag. The lack of visual fidelity. Poor framerates. The unreliable scripts. The lag. The expensive land. The lag!

 I'm sorry to say there is no "silver bullet" to solve these problems. There is no single problem LL can fix that will magic the lag away. That's reality, and it applies to the virtual world no matter how hard you click the heels of your no-mod ruby red slippers, with 600 resize/texture change/colour change scripts in each, together.

 However, there are little things you can do to alleviate these issues somewhat. They add up, so the more people who follow these tips, the better SL looks and runs for everyone.

Use fewer (and smaller) texture maps!

 This is a big one that few seem to consider.

 Textures eat up bandwidth to download, processing power for the sim to retrieve them from the asset server and deliver them to your viewer, and then your videocard needs to store them in memory and render them. Too many large textures are one of the biggest reasons SL gets such poor framerates and why everything takes so long to rez.

Here's some numbers for you, to help illustrate why slapping 1024x1024 textures on everything is bad;

64x64 : 16kb
128x128: 65kb
256x256: 262kb
512x512: 1MB!
1204x1024: 4MB!

 Most people only have 512MB of VRAM and Second Life refuses to use more than that for textures regardless.

 There is a really bad trend with mesh content. People using 1024x1024 textures on every surface, large and small. Often only utilizing small sections of these textures, the rest being unused data that you never see when looking at the object in-world. This is usually the result of applying the same texture to every surface in the 3D modelling program, using offsets for smaller surfaces, then baking shadows and exporting the full 1024x1024 textures even though the model only uses a small visible area.

 What you wind up with is something like this;
 A tiny bit of texture detail, huge area of unused black space. Additional texture detail is then added via multiple similar textures, usually at 1024x1024 resolution

 I've seen this on everything from houses to drinking cups. I bought a bar counter, basically a wooden box, which turned out to have eight unique 1024x1024 textures. In the same bar set was a tip jar, a small drinking cup with a sign reading "Tips" leaning against it. It used three 1024x1024 textures, a 1024x512 texture and a 512x512 texture. Everything in the set was like that. When I rezzed the set in an otherwise empty sim, my framerate dropped from 75fps to 5fps and remained that way until I removed all of the textures. With the geometry alone, my framerate shot straight back up to 75+.

 From another store I purchased a simple, one room house. Not counting the two windows and the single door, the house uses eighteen 1024x1024 textures. Realistically, this house could have been textured with no more than three 512x512 textures and looked more or less identical.

 Outside of the "Daikatana arrow" you never see texturing that inefficient in a videogame, and that is a part of why much prettier videgames run much more smoothly than SL. The performance impact of so many huge textures cannot be understated. This is why so many people experience poor performance in mesh-heavy environments. Mesh is great, low-poly builds allow for better performance than we could get from sculpts and prims, but overloading builds with too many huge textures extinguishes any performance gain.

 So how should texturing be done? More like this;

 Notice how the artist has combined as many elements as possible into a single texture, leaving very little unused black space. This reduces the amount of texture memory your creation eats up while also allowing you to maintain higher resolutions for your textures. The texture detail in the upper right corner is no less a resolution, but now we're using a single texture map instead of, potentially, upwards of six.

 Combine textures, use ALL the space in a texture map and wrap it around the visible surfaces of your mesh. There is no reason not to do this!

 And don't think this only applies to mesh! Those of you who work in prims and sculpts should also consider using fewer, smaller textures and wrapping textures around surfaces using texture offsets.

 A good rule of thumb, if a surface is smaller than 10x10m, use a 512x512 texture or smaller!   I'll get more into avatar textures when I get to draw weight but avatar attachments almost never need textures larger than 512x512 and rarely need textures even that large unless you're using a single texture on a mesh that covers your entire torso or lower body.
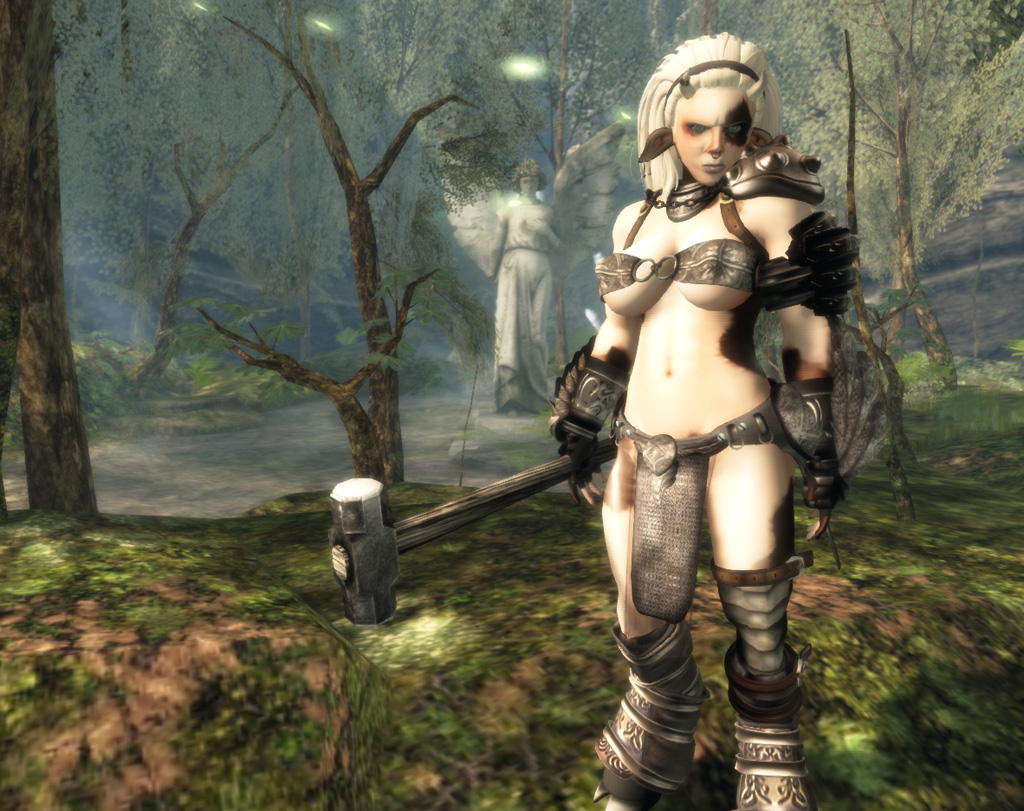
I've cut all the 1024x1024 textures and all but one or two of the
512x512 textures from my own avatar's attachments.
 Do you lose detail? Sure, but it's barely noticeable. The increased performance you gain, on the other hand, is substantial.

I've moved things around a bit and changes the trees to mesh since this screenshot.

 At my own fantasy build in Aleph (warning, it is an adult sim so you may encounter NSFW content there) I have used a variety of tricks to remove over sixty 1024x1024's worth of textures and saw my framerates jump from single digits to over 30fps in the worst areas. With shadows on. I'm seeing around 50-60fps in the best areas of the island, up from about 20 before I went gung-ho on texture use.

Use fewer, more efficient scripts!

 Full disclosure, I am not a scripter. I go cross-eyed when trying to cobble scripts together from code on the LSL wiki. If I'm wrong about anything, it will be in this section, but this is my understanding from years of managing sims and working extensively with very skilled scripters in SL. I've run these same recommendations past some of SL's top scripters and they agree with my assessment.

 Every script is a virtual machine which uses memory and processor time.

 Every sim in SL has a set amount of memory set aside for scripts. Now, relatively recently, LL did some things which give sims more memory for scripts, but it is still not an infinite amount!

 While there is memory available, scripts compete with each other for resources so a lot of scripts will, at first, only result in scripts themselves running slower. When the scripts running in that sim exceeds the amount of memory the sim has available, the server has to start using the swap file and that slows the sim down drastically.

 There are tricks to manage the amount of memory each script uses, but generally speaking the more scripts you use, the more memory you're using. This is why single script resizers are encouraged over putting a resize script in every prim of an object.

 Memory isn't the only thing. There's also processor time to consider. This is how much of the CPU resources scripts are using. Believe it or not, sims in SL do not have infinite processing power. So the more of a server's CPU time scripts are eating up, the less CPU there is for other scripts in the sim. This can make scripts run slowly, or not at all.

 So, if you can combine scripts, that's generally a good idea. If you have the option of using multiple scripts or one single script to do the exact same thing, use one single script even if it's more work to write.
You'd be amazed at how many features you can cram into a single avatar without exceeding 500k of script memory.

 Granted, we don't all script. I know my own avatar uses WAY more script memory and time than it should, but just being conscious of your script use, whether for your avatar or for things you build in the environment, can help you see ways to reduce your scripting footprint.

  A good idea is to check new purchases for scripts you don't need. I'm primarily talking items that may have scripted features for resizing, retexturing, etcetera, not scripted features you would use in regular, every day use of the item.

 Make a copy to wear around SL, and a copy to keep in your inventory in case you need the scripts later. Delete all of the unneeded scripts inside the attachment. Some TPVs make this easier. I believe Firestorm has a "delete all scripts in selection" feature which makes this as easy as a single click. Now use the script-free version as the copy you wear and you'll be sparing yourself, and everyone around you, potential lag.

Build small!

 "Oh, Penny! You're such a broken record! Why do you always go on about this?"

Because it works!

 The call for "realistic scale" isn't some irrational desire for everything to be "realistic", this is about design and it is about resource management.

 Constantly people complain about the cost of land! "Land is too expensive! LL should reduce tier!" Maybe so, but STOP BUILDING SO HUGE AND YOU CAN DO MORE WITH THE LAND YOU HAVE NOW!

 You cannot resize land. You want more? You gotta pay!

 If you know that much then it is crazy to blow things up to the sizes most people build at in SL. Larger objects eat up more space! That's not rocket science, that's 7th grade geometry. You can fit four times as many 10x10m squares as you can 20x20m in a given area.

 Most people build to around double scale (give or take), far exceeding the scale of most avatars contrary to the belief that everything is consistently scaled to the "average" avatar size). This is partially due to the default SL camera, partially due to people just eyeballing things and not even thinking about scale. This means your average SL sim holds only 1/4th a sim's worth of content. Or, to put it another way, if you build to scale you can fit about four times more content into a given space.

 "That's not true, Penny! What about prims? When you shrink stuff it uses the same amount of prims! You'll just wind up with an empty looking sim!"

 If you ONLY use prim content made after the release of mesh, then you kinda, almost, have a point. However, that describes almost nobody.

 Before mesh arrived along with the prim size increase to 64, prims were restricted to 10m to a side. Because of that, legacy content made before mesh is often bloated with redundant prims, far more than this content would have needed were it made to scale. Sometimes as much as four times as many prims.

 Now that we have mesh this isn't an issue, provided you're building your own content or have the skills to cull redundant prims from old prefabs. However, mesh itself increases in land impact cost the larger it is.
When working with mesh, whether it's furniture or full buildings, you can substantially reduce the LI cost simply by shrinking it down closer to 1=1 scale. This makes it easy for anyone, regardless of skill level, to reduce their LI footprint simply by reducing the size of their mesh objects.

 "Enough to make up for the 3/4 land area you free up in the process?"

  You tell me.

 Again, here is an SLURL to my M&C fantasy themed build in Second Life.

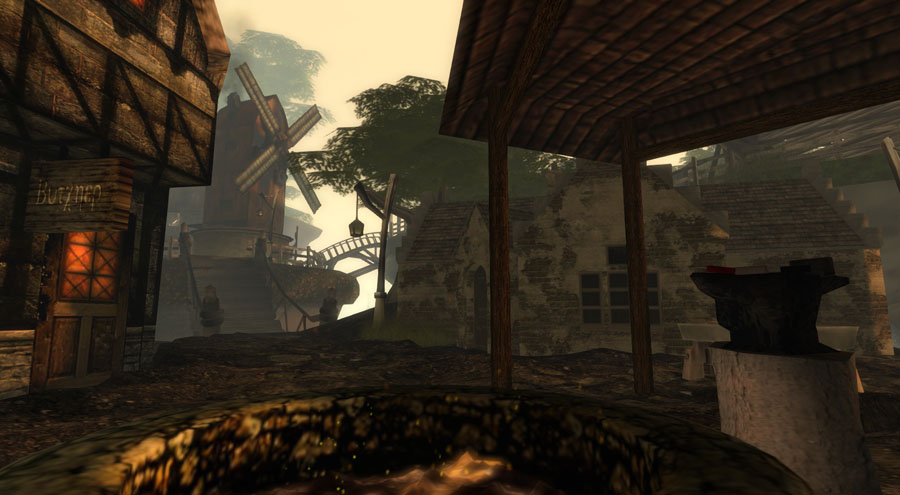
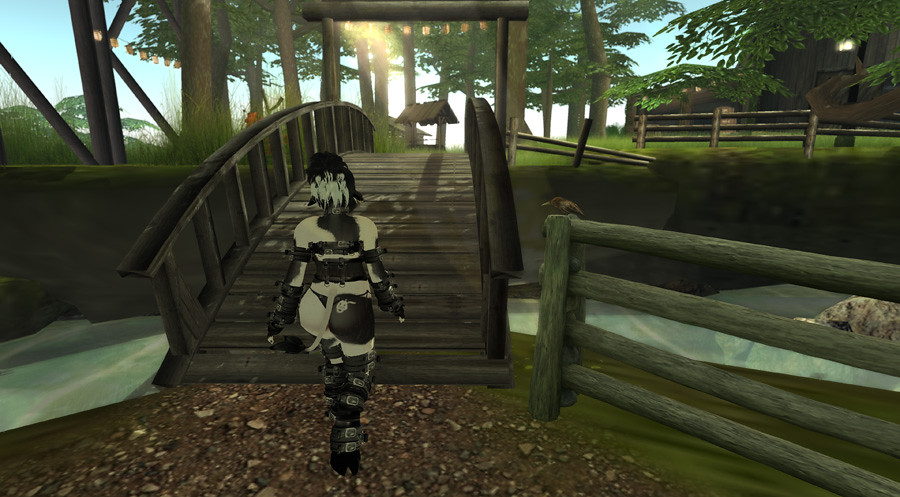
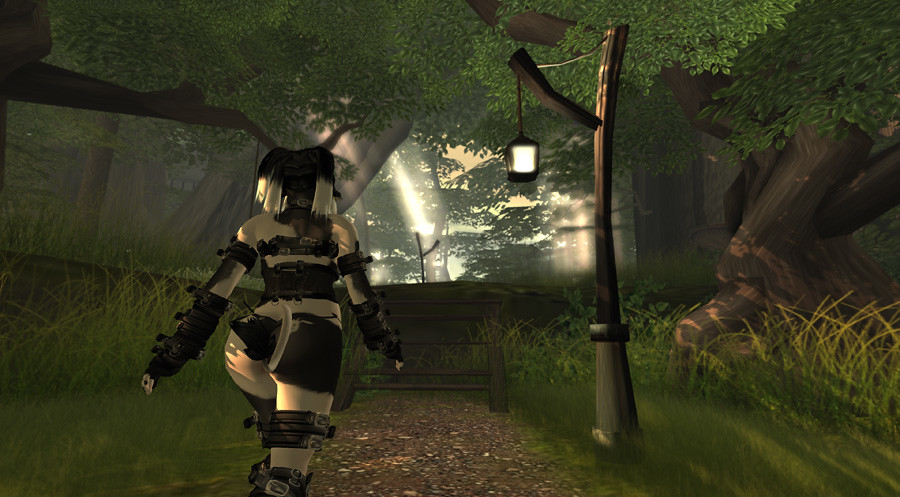
 I'll post some screenshots below, but I encourage you to go visit the island in person. It's an adult sim, so there's likely to be NSFW content and avatars around, but still, it's probably the best example of building a large, detailed environment while increasing framerates and reducing Land Impact via scale that you're likely to see in Second Life.

 Wander around. Don't just look with your camera. Building interiors are all done as skyboxes, there's tonnes of secret areas. A lot you can't see just by using your camera to snoop from afar. You are able to walk from the arrival point all the way up to the mountain at the far end of the sim.

 Try to do that. Walk all the way up there from the starting point, see the sim firsthand, then open the Land Information window and see how many prims are still available.


 That's right. That entire build is (at the time of this writing) using less than 1/3 of the sim's "prims". I could copy the whole thing twice over and still have LI free to add a bit more. I didn't have to mod anything, aside from resizing, to reduce it's LI, either. Thanks to mesh, you can reap all the LI savings of scaling down just by reducing the size of mesh content.

 I freed up so much LI this way that if I increased everything in the sim to it's original size, I'd not only fill up the sim's LI pool, but I'd exceed it and be forced to remove some of the content I currently have out.

 On top of that, at it's current scale, the island only uses about 2/3 of the sim's area. The entire 1/3 of the sim on the north side is empty. Meaning I could put more islands there on the same level as the rest of the floating island structure.

  The issue a lot of people worry about in building to a more reasonable scale is that many of SL's avatars are huge and may not be able to squeeze into such small environments. This worry is exaggerated somewhat, again people tend to build to a much larger scale than even SL's avatars tend to be. I've not had one single person complain to me that the island has been too small for them.

   You can design buildings so that larger avatars can squeeze through smaller doors by making doorframes phantom, making doors into teleporters, etcetera.

  The only real issue is the SL camera. The default camera placement is just plain bad. It was set up in 2002 or earlier, and LL has never updated it despite the strides the videogame industry has made in third person camera placement.

  Thankfully, it's a problem that is easily solved. Here are simple instructions for getting a much improved camera placement, with explanations which make it easy for you to tweak the camera to your personal liking.

  Also, third party viewers have begun adopting better camera placement, starting with the popular Nirans Viewer, known for it's visual improvements to the SL experience.

 If you're concerned about having traffic rates affected, the example I give here has very respectable traffic, then there are also Doomed Ship and 1920's Berlin. Both popular RP sims which have featured being built to scale for years.

 Now, if you're selling stuff there is an understandable concern about people being able to use your content right out of the box. If you're worried, I'd recommend including large and small copies of your items and letting the customer decide which to use. Give them information to let them make an informed decision. Such as the LI savings.

  The up side is, since the LI of mesh is reduced at smaller scales you can use that as a selling point.

 Selling smaller attachments is less of a problem. You should always, always, design attachments around the smallest possible size simply to make it usable by the largest potential market. It is easy, especially with resize scripts, to make an attachment larger, but it can be incredibly difficult to squeeze an attachment smaller when it was built around a larger size initially. Rigged mesh is a different issue, but rigged mesh is less affected by scale and more affected by body proportions due to its less than perfect implementation.

Draw Weight.

 Now, I just want to wrap this up with a few words on Draw Weight.

 Draw weight is by no means a perfect metric for how much of a burden your avatar is on anyone's hardware, but generally speaking if you can get your draw weight down you increase the framerates for yourself and those around you.

  The average SL user is often at the mercy of content creators as far as their ability to do so, and a lot of content creators do not provide much in the way of options.

 I'm going to pick on a couple of examples here but these are items I use myself, I think the creators did great work, I'm just trying to draw attention to efficiency issues very, very few people in SL ever even think to consider.

I am the prettiest princess!
 There's me, out on adventures. I love this hair, I purchased it at Wasabi Pills, great shop. I've bought a tonne of stuff there. I do have a couple issues with it, though.

  See the dark hair band? That originally had a 1024x1024 texture. That's pretty ridiculous. It's just a shaded cloth texture. I replaced it with a 64x64 texture that looks more or less the same unless you zoom in so close it fills your screen.

  Credit where due, the base hair texture is only 256x256, which is reasonable. Most people use 512x512 or 1024x1024 which is horrendously excessive. The alpha layer on this hair, however, is 512x512 and that's not really necessary at all.

 Then there's one more texture! Inside my head is a box with a 512x512 Wasabi Pills store logo on it.
Neither the prim nor the texture are necessary, both are entirely hidden yet place just as much extra rendering burden on the videocards of everyone who can see me as if it were a giant box on my head.
 People love those store logo root prims. I'm guilty of it, too. back when I was making avatar accessories before I got all efficiency conscious. They're unnecessary and just add to the pile of things SL is trying to make your hardware render.

  One prim and one 512x512 texture might seem small, but my hair doesn't exist in a vacuum. Every avatar you see has probably at least one attachment like that. If you're in a sim with thirty avatars, that's thirty 512x512 textures dumped into your video RAM and thirty extra cubes your videocard is processing.

  Chances are, those avatars have multiple attachments like that. A pair of sunglasses, each shoe! Maybe a hat, or even the root prim of their shirt or any prim/mesh body parts they're wearing. Suddenly, in a sim of thirty avatars you're already exceeding your texture memory just on textures you never even see! That's before getting into the textures they're wearing that you can see! Let alone the sim itself!
Content creators can help by ditching this bad habit!

  Alright, now look lower! Not that far! See the metal chain on the leather weapon harness I'm wearing? (Great looking work, by the way, I got it at Dark Prophet Designs.)

  The chain is a set of sculpts. Each link is a separate prim. Not great, considering you could do multiple links in a single sculpt, but what really shocked me was examining it to find that each link in the chain uses a separate, yet nearly identical 256x256 texture for each half of the chain (mirrored on the other half). That's a total of thirteen unique 256x256 textures, which look identical. Even worse, each of those thirteen prims also uses a separate sculpt map.

  Now, I took the time to remake that chain using just one of the prims, and replaced the texture with a 64x64 texture that looks identical unless you zoom in so close the chain fills the screen. Later, I replaced the chain entirely with a single sculpt.

  What's more, the rest of the harness is loaded with 1024x512 textures. Nothing in the harness needs a texture that large to look good, especially with the quality of the design.

 Now, being someone who can do graphics reasonably well, I can make my own replacement textures, I can rip apart prims and put them back together more efficiently. The average consumer cannot. Most of them don't even think about these things, nor should they ever need to!

  The people who make these things can, and I'm hoping that by making these issues more widely discussed, more content creators will make a point of working more efficiently.

  Make it a selling point! Advertise how little your work adds to avatar draw weight! (LL really should have made draw weight marketplace searchable information.) When it's pointed out to people as a feature like that, it is likely to influence their buying habits in a positive way and we all benefit with the performance boost that comes with more efficient content and avatars.

 Another tip for reducing draw weight is replacing sculpts with mesh. Sculpts are horribly inefficient with polygons and content creators are generally able to create far more detailed attachments using far fewer rendering resources just by using mesh. So, if you ever have the choice between similar attachments, one mesh and one sculpted, consider going with the mesh version.
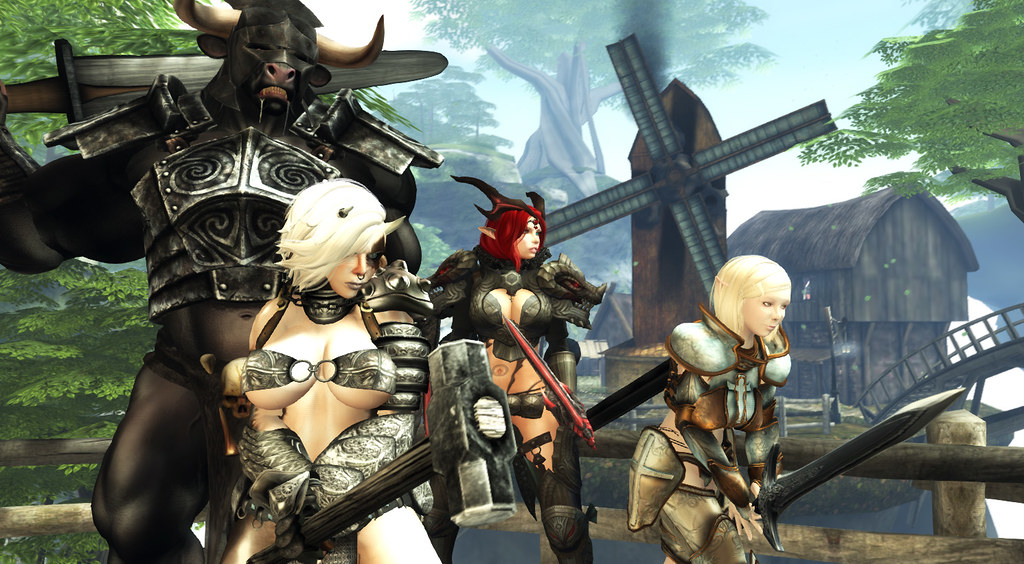
I have, by far, the lowest Draw Weight in this screenshot.
 At the time of this writing, my draw weight is 68,445, down from about 210,000 in January. I've managed to do this without anyone being able to see much if any difference in my appearance. I've cut out every hidden prim, every invisible root prim, every unseen texture, every redundant texture, every too-large texture and by replacing sculpts with mesh where possible. I'm sure if I replaced my remaining sculpts with mesh then I could cut my draw weight in half.

 My goal is to eventually reduce my draw weight out of the red (I think it turns to orange around 35,000), at which point I'll see if I can squeeze down to green.

 With mesh, if content creators start taking efficiency seriously, we can reach a point where there is no reason for anyone's draw weight to be over 35,000 and we can do that without sacrificing the quality of our avatars.


Thursday, February 21, 2013

Mesh Content Creators, You're Doing It Wrong!

Mesh is filling SL, which is great! I've recently redone Milk & Cream using as much mesh as possible and already people are telling me how great their framerates are despite the detail and sheer amount of content around the island!

I get an average of 30FPS around the new island with these graphics settings.
Shadows, Ambient occlusion, depth of field, etcetera.

I got 5-16FPS around the old island, which was mostly sculpts.
However, in building this I noticed one common thread in mesh content being sold in SL. Mesh content creators are building at the same sizes as they did with sculpts and prims prior to the introduction of mesh import and using that size as the basis for their advertised Land Impact costs. (When they're not outright lying to their customers by stating the number of mesh objects rather than the prim/LI cost, but that's another rant.)

 "Well, of course they would! Avatars are still 8' tall on average, and the SL default camera is still stuck in the 90's! They have to work around that!"

 Sure, to a point. You have to remember, mesh content gains Land Impact cost the larger you make it. I've literally cut the LI cost of mesh buildings in half by shrinking them down to a realistic size as opposed to the size the creator sold them at.

I was able to cut the LI cost of most of the mesh content down anywhere from 1/3 to 1/2!
This means more content around the island, which is still occupying only 1/4th of a sim!

 Lower Land  Impact costs are a boon to content creators because customers are often looking for the most bang for their buck in terms of detail versus LI cost. Higher LI means people can't fit as much in their land, and land is expensive!

 Before people point out many SL users can't even resize a prim I'm going to agree and counter that it is simplicity itself for a content creator to include both an "efficiently sized" version, the LI cost of which is what they advertise, and a scaled up version for more typical SL users. This takes, literally, seconds to do and costs the creator nothing.

 I'd add that content creators should make it clear in their listings that all LI costs are of the efficiently scaled version, and that a larger version is included with a higher LI cost. Most mesh sellers already note how SL changes LI costs based on size so this is a minor addition to what they're doing already.

 Ideally, Linden Lab themselves should be pushing more efficiently made content by improving the starter avatars, default camera settings and Linden maintained environments such as the infohubs, but since LL seems intent on driving customers away it would benefit content creators to encourage the trend towards efficient scale because it allows them to do so much more, and allows for an SL that is more appealing to new users, who in turn become new customers of the content creators.

Don't you wish all of SL was this detailed? It could be!
 In providing both the efficiently scaled version and the large version of their mesh content (as well as an explanation of why they are doing this and instructions on how to improve the SL camera), content creators ensure that their customers have the choice to use what better suits their needs, and and customers get exposed to how they can get more for their tier just by scaling down.

"I want less land and fewer prims, for the same amount of money!"
 - Nobody, Ever

Most people are simply unaware of the issue. It's in every content creator's best interest to make them aware of how size does matter in affecting their SL experience.

Thursday, January 12, 2012

Improving the SL Camera (Short Version)

I've updated this post! Check out the polished up version of this article!

 Last year I wrote a lengthy article explaining why camera placement matters in virtual environments, how the SL camera works and, finally, how to improve the SL camera yourself by adjusting some debug settings. By popular demand, here is an excerpt with just the part about how to improve your SL camera!


The Improved SL Camera

 If you like these camera settings, contact LL or the creators of your favourite SL viewer and ask them to include them as selectable presets! That way you don't have to manually enter them in with every viewer update and you can more easily share them to your friends!


 I am including in these directions the changes one needs to make to get either a centred view or a left shoulder offset. Most people prefer the right shoulder offset however some people who do not play many videogames have found the offset view difficult to adjust to and I've had at least one person ask me how to get a left shoulder view.

First you need to reveal the Advanced menu at the top of your screen. To do this simply press ctrl+alt+d and the menu will appear to the right of the Help menu in your menu bar. Viewer 3 users can also go to the Advanced tab in Preferences and select to have the Advanced menu shown.


 From the Advanced menu select "Show Debug Settings", near the bottom.


 The Debug Settings panel will appear. At the top of the Debug Settings panel is a field where you can type the name of the setting you'd like to adjust. 

 Viewer 3 users will want to type "CameraOffsetRearView".

 People using a 1.x viewer will instead type "CameraOffsetDefault".


The panel provides you with three integers to change for the x, y and z placement of your CameraOffset.  Change them to these settings;

x: -2.000
y: -0.400   ( Make positive for a left shoulder offset, leave as 0.000 for a centred view. ) 
z: -0.200

 Once that is done click on the input field again and move to the next setting;

Viewer 3 users will type "FocusOffsetRearView".

People using 1.x viewers will type "FocusOffsetDefault".


Once more you will have x, y and z  positions, this time for the focus point.
 Change them to these settings;

x: 0.900
y: -0.700   ( Make positive for a left shoulder offset, leave as 0.000 for a centred view. ) 
z: 0.200
Viewer 3 users will see their camera change as they enter each number, 1.x users may need to restart SL to see the changes to their camera take effect. 

Here's some solutions to issues some people run into.

Avatar fills entire screen. Simply zoom the camera out! The mousewheel zoom controls work exactly like before. You can also adjust the "x" CameraOffset to move the default camera position forward or back.

The view is odd, I can't see where I'm going/camera points up!
 Make sure you change both the CameraOffset and the FocusOffset. If you only change one and not the other it wont' do you much good at all!

 If you did everything correctly your view in SL should resemble this;


And this;


Click and hold on your avatar to angle your view up or down, even as you move!
 Enjoy!


 05-07-2012 Update! FOV improvement!
 Something I've noticed is that you can improve your SL view further by altering the FOV.


First, press ctrl+9 to make sure your FOV is at the default. Then, hold the ctrl key down and press 0 about 6 times. The resulting effect is that SL seems to have a greater sense of depth.

 It's difficult to capture this effect in screenshots as it has more to do with the way things look as your camera moves about, but I've found this to be a huge improvement in making SL look more cinematic.

Sunday, July 10, 2011

A Matter of Perspective


 This article is intended to illustrate the effects of camera placement on our engagement to, our ability to navigate and our freedom to create content within virtual worlds such as Second Life. I touched on much of this in "A Matter of Scale", but wanted to expand on the specific issues of camera placement in SL beyond the impact on scale, as well as explain how the camera placement settings in Second Life actually work.


A Matter of Perspective
The importance of camera placement in virtual environments.


"The video game industry spent a decade learning important lessons about how camera placement impacts our interaction with, and enjoyment of, virtual worlds -- lessons Linden Lab cannot afford to ignore."    

If you're in your late 20's or early 30's and have been playing video games since the 90's you probably recall what a hot issue camera placement was up until about 2005. In the early days of third person 3D video games how well the camera behaved was one of the primary concerns of most gamers. It could, quite literally, make or break a game. 

 From the time the first 3D gaming consoles arrived up until about 2005 every review of a third person video game made some mention of the camera placement and how it affected or hindered game-play as games came and went with varying degrees of success in dealing with the camera issue.

 The video game industry takes the issue of camera placement very seriously, trying many approaches to the issue to see what worked and what didn't. In 2005 Capcom's "Resident Evil 4" hit the market with a new "over the shoulder" camera view that worked so well for third person videogames that it has become the industry standard. 


Why is the over the shoulder view so popular?

There's three primary reasons.

Environment Creation -  The camera is crucial to environment design. You can't have cramped, claustrophobic corridors or a small shed in the woods if the camera sits so high it will wind up on the wrong side of the walls or ceiling. Larger environments don't seem nearly as large and impressive. Everything needs to be upscaled for usability and aesthetic impact, which presents additional problems, such as the fact that it will become increasingly difficult to keep the on-screen characters in scale with the environment.

Usability - The additional sense of "place" extends to a more intuitive sense of where your avatar is standing in relation to your surroundings, even when you may not be able to see your avatar's feet. This makes it easier to navigate your environment

Immersion - Placing the camera closer to eye level puts you, the player, into that world, rather than making you an outside observer watching from afar. It gives you more a sense of presence within the world.

 As you can imagine, all of this translates directly into a non-game 3D environment like SL, especially in the case of environment creation which is much more important directly to SL users, since the environments in SL are all user created.

Let's take a look at the camera placement in Second Life.

 Second Life has had the same camera placement since Linden Lab first opened the doors in 2003. The camera placement in SL is set very high above the avatar. Zoomed out far enough to see your whole avatar it sits approximately 2 metres over your avatar.


 When you try to zoom in, the camera continues to rest at least half a metre over you, with only the very top of your head remaining visible on screen.

Compare these screenshots to the video game screenshots above.

How does Second Life's camera placement affect environment creation, usability and immersion?

 Take that building to the right of my avatar in the screenshots above. The  criss-crossing roof supports sit at about 2.65m high. For a bit of perspective, the average ceiling in the average apartment/house sits lower at 2.45m high. I'm not even talking the roof itself, which peaks much higher.

Despite the high ceiling, this is what it looks like when I wander inside with SL's camera placement.

The environment creation issues are apparent immediately. As we walk inside we find that the camera sits above the supports.  If the ceiling was solid instead of a phantom sculpt, it would push the camera down below the ceiling, but it would still be angled down, at the back of my head.

  By resting so far above the avatar, the SL camera pushes up minimum required ceiling height. Taller ceilings will make buildings and rooms look stretched, which encourages people to expand outwards to compensate. This contributes to SL's scale problems by pushing environments out of scale with avatars, which encourages people to make larger avatars, which in turn pushes the camera up further because the taller your avatar is the higher up the camera rests.

 This greatly reduces your freedom to create in SL, since you are then forced to compensate for the SL camera.  At least if you are designing an area open to the public, such as a shop, club or a role-play sim. Also, larger builds eat up more prims and more space, leaving you with fewer options for content and detail in your build.

 These same issues make it extremely difficult to navigate smaller environments in SL, contributing to tendencies to greatly over-scale environments in SL. You just need much more space to see your surroundings than you would with camera placement closer to eye level.

 You can also see from these screenshots how the view in SL is more removed from your avatar than the shown in the video game examples, reducing immersion and engagement. You are not inside the room with your avatar, you are watching a character on a screen from above.

Why should this matter to me? I'm always alt+camming around my environment anyways!

 Chances are you're only using alt+cam to zip your camera around your environment when you're standing still. So as long as you're moving, camera placement is important. SL is not IMVU, your avatar isn't a static element in a 3D environment hopping between pre-set poses within a room, you can walk around, explore.

 If you want to explore a cave, wander the corridors of a dark spaceship, a dimly lit fallout shelter, or simply walk from one room to another in your own hosue in SL you are affected by this.

Is there any way to improve the camera placement in SL?

Yes, it's actually quite easy.

Some readers may recall that Torley Linden posted, some time ago, a video with instructions on how to adjust the camera placement in SL. Unfortunately Torley's video only covered half the process. There are actually two debug settings you need to change to properly adjust your camera placement in SL.

Here's a screenshot to help you visualize the settings.


It helps to think of these two debug settings as tacks on a cork board with a string tied between them. "A" in the graphic above represents your "CameraOffset", this is the setting Torley mentions in the video.

"B" in the graphic represents your "FocusOffset", in simple terms this is the area in space where your camera is pointed.

 Let's take a look at what happens when you adjust "A", the Camera Offset, without adjusting "B", the Focus Offset.

 With lowering "A", the Camera Offset, to eye level while leaving "B", the FocusOffset, where it was "A" is now below "B", meaning your camera is actually pointed at an upwards angle. Not much of an improvement now that your camera is looking up towards the sky. It allows you to more easily deal with lower ceilings, but disrupts your sense of  "place" in your environment.

 So this is why we need  to also adjust "B", to keep the camera angled forward and down.


 Seeing is believing, here's a few comparison shots between the default SL camera placement and some custom settings I'll share in a moment. The default camera is on the left, my own settings on the right.

In an open environment you don't run into too many difficulties, although you are more removed from your avatar, as if watching from above. The lower camera angle brings you into the world with your avatar. It's more like "being there".
 Inside is more of an issue, here I've even angled the camera down slightly so it's below the ceiling support beams, but what you can't see here is that this caused issues between my camera and the wall behind me. My camera continuously snapped from inside to outside the wall. I have no such issue with my own camera settings on the right. Also, you can see that it is much easier to judge where I am in the room in relation to the hay bales scattered about than it is with the default camera placement where my avatar is cut off above the waist. I don't even see the ceiling supports from an eye level view unless I angle my camera up!

Will altering my camera affect items with scripted camera controls?

Not one bit.  Vehicles, camera positioning HUDs, chairs that take over your camera placement, will all work exactly as they did before.

What if I don't like the changes after I've made them?
Simply look up the two debug settings you changed and click the "Reset to Defaults" button for each one. This will reset your camera to the original SL default placement, exactly as it was before you made any changes.
Alright, how do I change my camera placement?

This is simple, but I will need to go into a bit of detail because it is slightly different between 1.x viewers and Viewer 2.

 I am including in these directions the changes one needs to make to get either a centred view or a left shoulder offset. Most people prefer the right shoulder offset however some people who do not play many videogames have found the offset view difficult to adjust to and I've had at least one person ask me how to get a left shoulder view.

First you need to reveal the Advanced menu at the top of your screen. To do this simply press ctrl+alt+a and the menu will appear to the right of the Help menu in your menu bar. Viewer 2 users can also go to the Advanced tab in Preferences and select to have the Advanced menu shown.


 From the Advanced menu select "Show Debug Settings", near the bottom.


 The Debug Settings panel will appear. At the top of the Debug Settings panel is a field where you can type the name of the setting you'd like to adjust. 

 Viewer 2 users will want to type "CameraOffsetRearView".

 People using a 1.x viewer will instead type "CameraOffsetDefault".


The panel provides you with three integers to change for the x, y and z placement of your CameraOffset.  Change them to these settings;

x: -2.000
y: -0.400   ( Make positive for a left shoulder offset, leave as 0.000 for a centred view. ) 
z: -0.200

 Once that is done click on the input field again and move to the next setting;

Viewer 2 users will type "FocusOffsetRearView".

People using 1.x viewers will type "FocusOffsetDefault".


Once more you will have x, y and z  positions, this time for the focus point.
 Change them to these settings;

x: 0.900
y: -0.700   ( Make positive for a left shoulder offset, leave as 0.000 for a centred view. ) 
z: 0.200

Viewer 2 users will see their camera change as they enter each number, 1.x users may need to restart SL to see the changes to their camera take effect. 

 Now, while most people seem to enjoy the camera settings I have heard a couple puzzling complaints.

Ack! My avatar fills my screen! This is terrible!
 Simply zoom the camera out! The mousewheel zoom controls work exactly like before. You can also adjust the "x" CameraOffset to move the default camera position forward or back.

I didn't like these settings because I couldn't see my avatar! I want to see more of my avatar, not less!
 This is an extra odd one because these settings should bring more of your avatar into view, not less. I've found this one always seems due to a mistake made when adjusting the settings. Make sure you change both the CameraOffset and the FocusOffset.

 If you did everything correctly your view in SL should resemble this;


 Additional Camera Features

 I also wanted to mention some interesting camera features that many are aware of, but many are not. 

Are you aware that you can move your camera around with the mouse as you're avatar is moving? You can even steer your avatar this way for finer control of your avatar in navigating an environment!

 To make use of this feature simply move your mouse cursor over either your avatar or your avatar's name tag then press and hold the left mouse button.

 While holding the left mouse button down, move your mouse. You'll find your camera moves as you do, move the camera far enough to the left or right and your avatar will begin to turn in that direction. You can also angle the camera up or down in this way, even as you're walking.


Click and hold on your avatar to angle your view up or down, even as you move!
 This has a bit of an interesting side effect on your movement controls. As long as you continue to hold the left mouse button down the keys that normally turn your avatar left/right will instead cause your avatar to "strafe" to the left or right just as they do when in mouselook!

 Enjoy your new perspective in Second Life! 

 I recommend visiting sims like Mont St. Michel, Doomed Ship, the Wastelands and 1920's Berlin, all of which are vastly improved by better camera placement, to see just how different it can be when travelling through small corridors, underground tunnels and through 1=1 scale environments. 

 Here is a Jira requesting these changes be made in the official viewer.

 The nice thing is that with one of the Viewer 2 updates LL introduced camera placement presets. There is now a rear view, front view and a side/group view camera preset built into Viewer 2. This is why the Camera and Focus Offsets were renamed for Viewer 2. This means LL could easily add in more presets, such as creating a new default preset, while retaining the old camera placement as a "classic view" for residents unable to adjust to a new camera placement. They could also make the left shoulder offset and centred view as easily selectable presets one can choose from either the "Preferences" window or the "View" panel.

 Given the popularity of the "over the shoulder" view it seems guaranteed to help draw in and retain more new users and with how simple it is to implement it's a wonder they haven't already.